Woohoo! Take a look at our sun room before the curtains...
...and after! The fabric is perfect and my crew of workers couldn't have been better! My mom and I sewed for a day and a half straight (it was a LOT of fabric to deal with) and then my hubby and dad hung the curtains for me today. Aren't they cute?!
Picture perfect!
I got the original idea from a page that I ripped out of Good Housekeeping. I loved the bold print and Roman shades--and I already had the red couch--so I decided to copy cat. The result is just lovely! Whimsical, light, and airy, just like this room should be. I would be remiss if I didn't also mention that I followed a tutorial for the faux Roman shade.
Showing posts with label Sewing Projects. Show all posts
Monday, April 9, 2012
Tuesday, February 7, 2012
Knock, knock...
Who's there?!
So I guess I missed my chance to blog about all things January 2012. Suffice it to say I was B-U-S-Y, mostly because I started my own business. I am excited to share that I am now a Mary Kay consultant! Have any of you ever sold MK before? Just wondering...
Several of my friends have nudged me to get back on here and blog. This is a short one to say the least, but it's late! It past my bedtime, and I should be asleep already. I'll just leave you with one little picture of my current sewing project.
So I guess I missed my chance to blog about all things January 2012. Suffice it to say I was B-U-S-Y, mostly because I started my own business. I am excited to share that I am now a Mary Kay consultant! Have any of you ever sold MK before? Just wondering...
Several of my friends have nudged me to get back on here and blog. This is a short one to say the least, but it's late! It past my bedtime, and I should be asleep already. I'll just leave you with one little picture of my current sewing project.
Sunday, December 25, 2011
A Thank-you Quilt
Several months ago, one of my mother's friends generously offered to refinish a table that she was giving to B and me. Since then, I had been planning on making something for him as a thank you. I finally decided upon a strip quilt, which I thought he would be able to use since he has two, very young granddaughters. In order to get it together a little faster than normal, I decided to sew around the edges inside-out and then flip the quilt right-side out through a small opening that I left. I ironed around the edges and then top-stitched to give it an edge. This was certainly much faster than bias tape, but it really complicated the quilting process because it didn't allow me to stretch and baste the pieces of the sandwich together. As a result, many of my quilted lines puckered near the edge where I had top-stitched. Of course, these were really just minor imperfections that disappeared after the first washing/drying.
All of the fabric that I used came from my cousin who donated so many beautiful prints. I enjoyed going through them and figuring out the order for the strips. For the back I ended up using a perky green print with bold flowers. The colors were perfect with the citrus colors on the front.
In the end, the recipient was so pleased with the quilt and used it just a few days later to tuck his granddaughter in for a nap. Great success!
All of the fabric that I used came from my cousin who donated so many beautiful prints. I enjoyed going through them and figuring out the order for the strips. For the back I ended up using a perky green print with bold flowers. The colors were perfect with the citrus colors on the front.
In the end, the recipient was so pleased with the quilt and used it just a few days later to tuck his granddaughter in for a nap. Great success!
Monday, November 28, 2011
This Year's Tree Ornament
I got this bullfinch (birdie) pattern here and decided to use whatever scraps I had lying about. So instead of black, white, and red, mine are... well, you can see for yourself! I used them to decorate the wine bottles I was giving to some of my family members.
I've been working on other sewing projects, too... but I have to keep those under wraps (pun IN-tended) until after Christmas.
Wednesday, November 23, 2011
Stuffed Elephant (cute!)
Today I got inspired to sew something for a friend's up-coming baby shower. After a little nudging from MMC (thanks for sharing the pattern) I embarked upon the stuffed elephant from Retro Mama on Etsy. I made the elephant out of soft flannel and embroidered its eyes--my first time doing a satin stitch. The elephant alone didn't quite seem like a complete gift, so I added some coordinating burp rags. I'm happy with the finished product, and I hope the mommy-to-be is, too.
Tuesday, October 4, 2011
Tuesday, June 21, 2011
Sew Many Machines!
I wish I had taken a picture today. The back of my car was FULL of sewing machines. And I mean full. Nine machines in all.
And I am tickled pink.
Many, many months ago, my co-worker (buddy, partner-in-crime, bff), Jackpot, and I decided that because we've both been having so much fun sewing, we wanted to see about starting a sewing club at school for our students. It turns out that our Home Ec teacher didn't have any sewing machines in her department. It's the modern world, baby! And PS: she's not the "Home Ec" teacher anymore... she's the "FACS" teacher. That stands for Family and Consumer Science.
So, despite the minor set-back, we persevered. With the help of our FACS teacher, we got connected with her boss and found out that there would be some old machines being retired at the end of the school year. Yes, our school year is STILL going on. Today, we went and picked up those nine machines. So excited!
Tomorrow is the last day of school -- and that's a good thing -- but with these new machines just arriving, I'm secretly already chomping at the bit! I can't wait to get our club up and running next year. We're hoping the kids will be excited to put their sewing skills to good use! We'll be looking for sewing projects and ways to donate our handiwork...
...and maybe we'll make a few things for ourselves along the way, too.
And I am tickled pink.
Many, many months ago, my co-worker (buddy, partner-in-crime, bff), Jackpot, and I decided that because we've both been having so much fun sewing, we wanted to see about starting a sewing club at school for our students. It turns out that our Home Ec teacher didn't have any sewing machines in her department. It's the modern world, baby! And PS: she's not the "Home Ec" teacher anymore... she's the "FACS" teacher. That stands for Family and Consumer Science.
So, despite the minor set-back, we persevered. With the help of our FACS teacher, we got connected with her boss and found out that there would be some old machines being retired at the end of the school year. Yes, our school year is STILL going on. Today, we went and picked up those nine machines. So excited!
Tomorrow is the last day of school -- and that's a good thing -- but with these new machines just arriving, I'm secretly already chomping at the bit! I can't wait to get our club up and running next year. We're hoping the kids will be excited to put their sewing skills to good use! We'll be looking for sewing projects and ways to donate our handiwork...
...and maybe we'll make a few things for ourselves along the way, too.
Saturday, June 11, 2011
Another Baby (Blanket)
Another colleague is expecting a baby any day now. Since she doesn't know whether it's a boy or a girl, I decided to get a little creative with my binding colors. This was an excellent way for me to practicing sewing bias tape together (ugh, what a pain) and also a great way to use scraps!
Thursday, May 26, 2011
Sew Mama Sew - Giveaway Day (Part 3: The Winner)
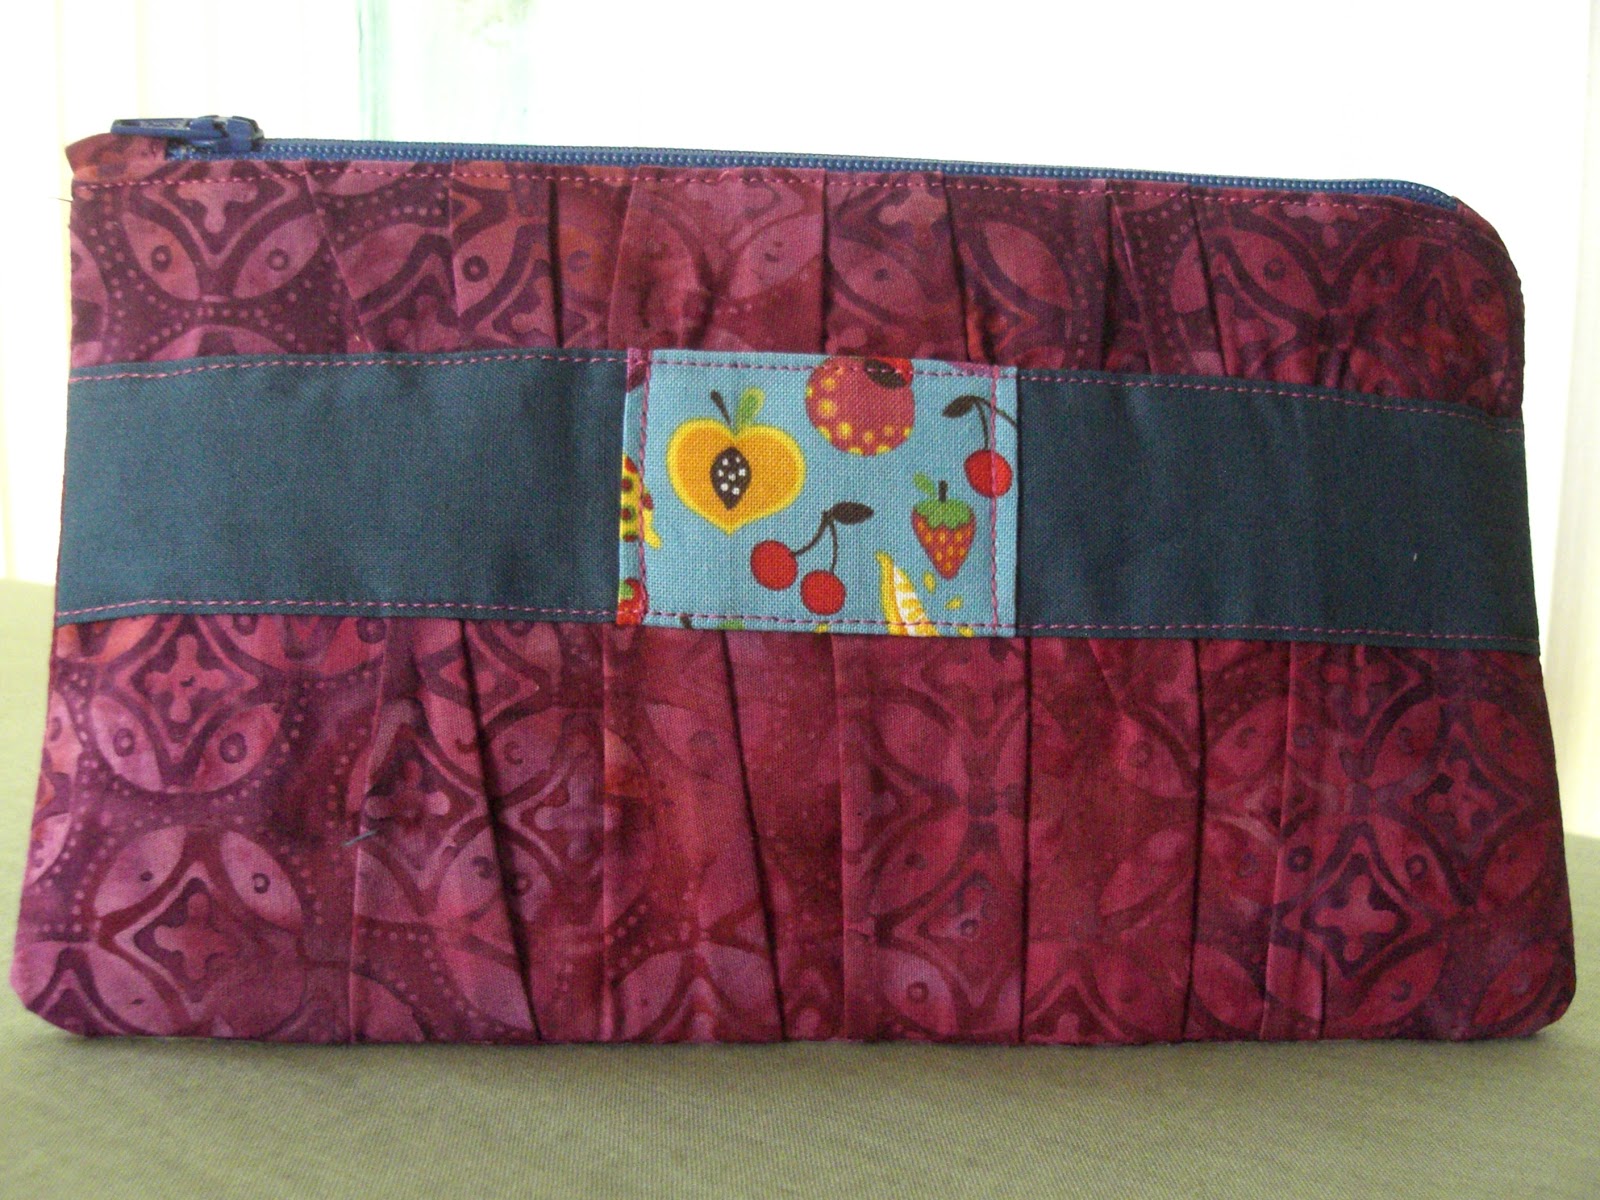
So excited to show you my finished clutch, and even more excited to share it! (I think it's my cutest one yet!).
The winner is Stephanie, who said:
Thank you for the great giveaway. My name is Steph, and I've been crafting since I can remember. I started by learning how to embroider from my grandmother, but now I also do a lot of sewing, cross stitch, and painting.
I hope you all had as much fun "playing" as I did. Don't wait until the next SMS giveaway to come back and say 'hi'!
Thank you for the great giveaway. My name is Steph, and I've been crafting since I can remember. I started by learning how to embroider from my grandmother, but now I also do a lot of sewing, cross stitch, and painting.
I hope you all had as much fun "playing" as I did. Don't wait until the next SMS giveaway to come back and say 'hi'!
Sunday, May 1, 2011
Stomp, stomp!
This adorable flannel with elephants stomping all over was just begging to be made into a receiving blanket. I'm sending it to a friend from work. Congrats on your new, baby boy, K!
Wednesday, April 13, 2011
A Birthday Wish
Once upon a time, there was a little girl with a little house...
...but at night, when the wind would blow, she'd have to curl up to keep warm. So, on her first birthday, she wished with all her might for something pink and purple and cuddly (or at least that's what I'm sure she would have said if she could talk that well).
Ta-da! Do you think she'll like them? Her very own monogrammed pillow and matching blanket, just right for her new house.
...but at night, when the wind would blow, she'd have to curl up to keep warm. So, on her first birthday, she wished with all her might for something pink and purple and cuddly (or at least that's what I'm sure she would have said if she could talk that well).
Ta-da! Do you think she'll like them? Her very own monogrammed pillow and matching blanket, just right for her new house.
Thursday, March 31, 2011
Back in the Saddle
...or rather, "Back at the Pedal"??
It feels good! If only it weren't for the tediousness of cutting, I would always be sewing! This time, I was working on a receiving blanket for a co-worker's baby shower. Which is tomorrow. Just call me the Queen of Procrastination!
Wednesday, March 23, 2011
Winning Wednesday?
Well, I can't help it. I'm dying to win one of these online competitions, so here I am... entering my pillow in the hopes of winning some absolutely adorable fabric! Check out the competition here:
And here, for the sake of the competition, is a recap of the pillow I made for my sister:
E and I went shopping together one day, which is when she found the perfect chair for her bedroom (from Pier 1). She also found an adorable stuffed owl, which she splurged on. The only thing missing was a pillow to provide some lumbar support. The pillows in Pier 1 were interesting, but not what she was looking for. So I offered to make it for her! We left the store and headed straight for my favorite fabric store. She selected the prints, and I put it together for her. It turned out pretty good and was a hit with both my sister and her kitty!
Saturday, March 19, 2011
Sew-in: FAIL
Instead of staying in to sew (as I promised to do) B and I went out and celebrated birthdays in B'more. No regrets here!
Happy Birthday yesterday to VA and today to Eizzil... the big 3-0 looks good on you ladies!!
Maybe I'll try that Friday Night Sew-in next time around...
Happy Birthday yesterday to VA and today to Eizzil... the big 3-0 looks good on you ladies!!
Maybe I'll try that Friday Night Sew-in next time around...
Friday, March 11, 2011
Friday Night Sew In
Join in on the next Friday Night Sew In. I had never heard of this (but thanks to Google Reader and all my new blog subscriptions) I found out that this is something that Handmade Heidi does quite often. I'm all in, and you should be too!
Check out the *rules* and sign up for March 18th's Friday Night Sew In!

Check out the *rules* and sign up for March 18th's Friday Night Sew In!

Sunday, March 6, 2011
Ottoman Slip-Cover
B and I are expecting a house-guest later this week. That meant that I needed to finish at least one of the sun-room-makeover projects: the ottoman slip cover. It was a work in progress, and much like the beer-jug-cozy, I figured it out as I went along.
Step One:
While in the fabric store, I made a sketch of the dimensions of the 5 faces of the ottoman and used that to plan how much fabric to buy. I used those same dimensions to cut the 45" wide fabric into five pieces.
Step 2:
I sewed each of the four side pieces to the top piece, one at a time, right sides together. I pressed the seams "down" toward the floor.
Step 3:
I placed right sides together and sewed each of the corner seams.
Unfortunately, I had over-compensated too much, so my slip cover was too big. You can see the excess fabric in the picture below.
In order to correct that problem, I tucked the excess fabric underneath itself, creating a small fold on each corner. I pinned these in place and then sewed a one-inch line (from the inside to hide the stitches) to hold the tucks in place.
Yeah, this part didn't go so smoothly. The first time I sewed my one-inch line it showed through to the front.
Here, you can see the one-inch line that I sewed approximately one inch in from the original side-seam.
Step four:
I moved the ottoman to my kitchen floor so that I could accurately measure for length. This ottoman has feet that sink into the carpet, giving me a false sense of height. I put the slip cover on the ottoman inside-out so that I could roll up the bottoms and pin them in place.
Step five:
As a way of checking the accuracy of my pinning job, I measured from the sewing line to the edge of the fold and pinned it into place. Then I ironed each fold to make a crisp edge.
I put the slip cover on the ottoman one last time to make sure that I had done a good job of pinning the bottom. You know how anal I am. And how much I hate my seam ripper!
Step six:
I went back to the folded edges and unpinned them. As I did so, I folded the raw edge under and then re-pinned the fabric into place. I ironed everything again. Finally, I was ready to stitch the "hem" into place.
Step seven:
First I sewed around the bottom of the slip cover -- as close to the edge as I could get. Then I sewed around the bottom again, this time using the first line of stitches as a guide along which I followed with my presser foot.
All done! I would estimate that this project took me about 3 hours from start to finish. At least now I can finally relax (and see if I can't get a shoulder massage)...
Step One:
While in the fabric store, I made a sketch of the dimensions of the 5 faces of the ottoman and used that to plan how much fabric to buy. I used those same dimensions to cut the 45" wide fabric into five pieces.
Step 2:
I sewed each of the four side pieces to the top piece, one at a time, right sides together. I pressed the seams "down" toward the floor.
Step 3:
I placed right sides together and sewed each of the corner seams.
Unfortunately, I had over-compensated too much, so my slip cover was too big. You can see the excess fabric in the picture below.
In order to correct that problem, I tucked the excess fabric underneath itself, creating a small fold on each corner. I pinned these in place and then sewed a one-inch line (from the inside to hide the stitches) to hold the tucks in place.
Yeah, this part didn't go so smoothly. The first time I sewed my one-inch line it showed through to the front.
Here, you can see the one-inch line that I sewed approximately one inch in from the original side-seam.
Step four:
I moved the ottoman to my kitchen floor so that I could accurately measure for length. This ottoman has feet that sink into the carpet, giving me a false sense of height. I put the slip cover on the ottoman inside-out so that I could roll up the bottoms and pin them in place.
Step five:
As a way of checking the accuracy of my pinning job, I measured from the sewing line to the edge of the fold and pinned it into place. Then I ironed each fold to make a crisp edge.
I put the slip cover on the ottoman one last time to make sure that I had done a good job of pinning the bottom. You know how anal I am. And how much I hate my seam ripper!
Step six:
I went back to the folded edges and unpinned them. As I did so, I folded the raw edge under and then re-pinned the fabric into place. I ironed everything again. Finally, I was ready to stitch the "hem" into place.
Step seven:
First I sewed around the bottom of the slip cover -- as close to the edge as I could get. Then I sewed around the bottom again, this time using the first line of stitches as a guide along which I followed with my presser foot.
All done! I would estimate that this project took me about 3 hours from start to finish. At least now I can finally relax (and see if I can't get a shoulder massage)...
Tuesday, February 22, 2011
Sun-Room Makeover
B and I spent our *five day weekend* shopping for furniture, assembling said furniture, and then shopping for fabrics to complete the sun-room makeover. This room gets the most natural light in our house (hence the name), so it was important to have a multi-functional space. A place where I could sew, B could study, we could snuggle up and read... you get the idea. The result is still a work in progress, but it's well on its way to beautiful!
BEFORE: Maple table and chairs. No color.
PHASE 1: New black chairs and red comfy couch. I also moved my reading lamp and an old ottoman into this space so that we could better appreciate them. Although there's color now, the room still doesn't seem cohesive.
PHASE 2: After spending two-and-a-half hours in Jo-Ann Fabrics, I came home with the following array of new fabric. The plan was to find a way to tie the yellow walls in with the red chair and the teal accents in the living room. You can see that two of the prints combine all three! Score!
Here I've draped the fabrics over the pillow forms and the ottoman. I still have LOTS of sewing to do, and I can't wait.
BEFORE: Maple table and chairs. No color.
PHASE 1: New black chairs and red comfy couch. I also moved my reading lamp and an old ottoman into this space so that we could better appreciate them. Although there's color now, the room still doesn't seem cohesive.
PHASE 2: After spending two-and-a-half hours in Jo-Ann Fabrics, I came home with the following array of new fabric. The plan was to find a way to tie the yellow walls in with the red chair and the teal accents in the living room. You can see that two of the prints combine all three! Score!
Here I've draped the fabrics over the pillow forms and the ottoman. I still have LOTS of sewing to do, and I can't wait.
Subscribe to:
Posts (Atom)