Well, this holiday season has been marked by some unusual (but possibly new?) Christmas traditions. To begin with, my family celebrated our Christmas a weekend early. This makes the third year in a row that we've done this, and it works well. Because we celebrate early, everyone and all of their people are able to attend. And it's great.
Except... on the 25th there's sorta nothing to do. Weird.
After being cooped-up inside all day long on Christmas, hubby and I decided to take a walk around our neighborhood. We got to enjoy everyone's lights and decorations, but it was kinda eerie, walking around, alone. Seriously, there wasn't another soul out there! I guess that's what we should have expected at 5:30 on Christmas night. For some reason, that got hubby to thinking, and that's when it occurred to him that there was one place where we could be around other living, breathing people. At his realization, we were like two little, giddy kids. We hurried home, grabbed our car keys, and zoomed off toward the nearest Chinese food buffet. (Too bad they didn't sing Deck the Halls to us like in that Christmas movie). It was great!
I know it's silly and non-traditional, but we loved it. Maybe that'll be our new holiday tradition?
Sunday, December 26, 2010
Sunday, December 19, 2010
Honoring the Pledge
I know that this follow-up to my previous quilting post has been a long-time coming. But I was busy! So here it is, Part 2 of the Disappearing Nine Quilt Process.
After creating all of my blocks, my next step was to figure out where each block would go. I started by randomly laying each block on the floor, side-by-side. I tried not to ever let any two seams line up with one another. Sometimes it happened, but not often. By alternating where the seams are, it makes the quilt stronger. I stood back and stared at the "quilt" and walked away and came back. I swapped a few blocks to try and evenly disperse all of the concentrated areas of color. If I felt like there were too many splotches of green in one area, I would try to move it to another section and replace it with something orange or red. In the end, I didn't stress over it too much because every time I moved a block, it was tricky to find another one that would be more suitable, but also not violate my "no two seams together" rule.
Once I finalized the layout, I labeled each row by pinning a number to the first block on the left. This way I would be able to maintain the layout even after I disassembled everything to sew it together.


 After sewing the blocks into rows, I ironed the seams in alternating directions. Even-numbered rows got ironed to the right, and odd-numbered rows got ironed to the left. Again, this helps to minimize the amount of bulk that has to be quilted over later on. Here is a picture of my rows, sewn together:
 Now I was ready to sew the rows together. Last time I made a quilt, this is where I had the most trouble. This is where it matters whether or not you were precise in your cutting and sewing. This is where you try to match up all of the corners! Thank goodness I had picked up an invaluable piece of advice from S. She wisely clued me into the fact that fabric stretches (duh!) so if corners weren't slated to line-up, I could just stretch something to force the corners to align. Yay! There's also this technique called "nesting." Because the seams were ironed in alternating directions, they can be "nested" together to assure that the corners will be lined up. Check out this picture to see what I mean:

 And here (though it's hard to tell from a picture) I've stretched the top layer of fabric to force it to line up properly with the bottom layer. I'm pinching the two together with my thumb and forefinger.
 The finished quilt top measured 7 squares by 9 squares. It wasn't quite as big as I wanted it to be, so I decided to add a border.
 I hadn't yet bought any border fabric, so I packed up my quilt top and headed back to the fabric store. Luckily my good friend S (another S!) was able to join me and help in my quest for the perfect border fabric. This was no easy task. Some fabrics weren't quite the right hue, while others didn't match the modern vibe. I had fully expected to buy a raspberry-colored print--something that would give your eyes a place to rest since the rest of the quilt was so busy. Surprisingly, I instead fell in love with a neon-red print with silver-dollar-sized circles on it. I bought 2 yards with which to make the border and binding. For the border I cut seven strips, each 6 1/2" x 40". For the binding I cut eight strips 2 1/4" by 40".
 I sewed two strips of border to each other so that I had long enough pieces for each side. Then I sewed the border to the top and bottom of the quilt. After I sewed them on, I used my rotary cutter to trip the edges to match the width of the quilt. Then I sewed the remaining pieces of border to the two sides of the quilt.
The next step was to figure out the backing. I decided to use a twin-sized sheet because it would save me the trouble of having to sew together strips of store-bought fabric (which are not as wide as my quilt). An added bonus is that Ikea sells twin sheets separately and for only $4.50! I never could have bought the necessary 3 yards of fabric for that bargain price.
Again, I went to the store expecting to buy a raspberry-colored piece of fabric. I had it in my mind that it would be a soothing color to balance the vibrancy of the front. Unfortunately for me, that plan failed. Ikea didn't have that color. The two best options were red or dark blue. I considered the red since it matched the border perfectly. However, I reminded myself that I was looking for something to bring some sense of calm to the quilt. This was, after all, a present for my grandma, not a 7-year-old girl. I settled on the dark blue, even though there wasn't a lick of blue anywhere on the quilt.
I had saved some scraps of fabric from my twelve original prints, and I wanted to incorporate them on the back of the quilt. I think it's prettier when quilts have some pizazz on the back. S had used her scraps to make a strip with alternating pieces of colors and backing. Hers was beautiful and I was inspired! Here's the end result:
 From the above picture, you can also see how I decided to use horizontal lines to quilt the fabric. I hoped that the vertical lines, sewn with the neon red thread, would enhance the modern feel of the quilt. In order to make the lines straight, I used a washable fabric pen and my ruler to draw lines on the front of the quilt at 2" intervals. I made sure to line up the quilting lines with the seams in the blocks. Quilting over top of seams that are already there is called "stitching in the ditch."
 With the quilting out of the way, the last step was to first machine stitch the binding to the front of the quilt and then hand-stitch the binding to the back of the quilt.
 Hand-stitching was something that I was dreading. DREADING with a capital 'D'! I decided that the best thing I could do for myself was to research some tips to help make the process a little easier. THANK YOU to Mal at Turning*Turning. Her "Mamma-Jamma Knot" and tutorial on the "Ladder Step Stitch" were invaluable to me.
 With just days to go before I had to give the quilt away, I spent several hours each night working on the hand-stitching (I'm not a very fast sewer, and I kept stabbing my thumb--ouch! I'm definitely going to invest in one of those leather thumb-protectors before I work on my next quilt).
 When all was said and done, I was very pleased with the quilt. In fact, it was hard to give it away. That is, until I saw my grandmother's reaction.
It was truly a labor of love.


After creating all of my blocks, my next step was to figure out where each block would go. I started by randomly laying each block on the floor, side-by-side. I tried not to ever let any two seams line up with one another. Sometimes it happened, but not often. By alternating where the seams are, it makes the quilt stronger. I stood back and stared at the "quilt" and walked away and came back. I swapped a few blocks to try and evenly disperse all of the concentrated areas of color. If I felt like there were too many splotches of green in one area, I would try to move it to another section and replace it with something orange or red. In the end, I didn't stress over it too much because every time I moved a block, it was tricky to find another one that would be more suitable, but also not violate my "no two seams together" rule.
Once I finalized the layout, I labeled each row by pinning a number to the first block on the left. This way I would be able to maintain the layout even after I disassembled everything to sew it together.

I was very careful to make sure that my corners were squared up before I sewed anything together. I knew that precision now would be important later in the process.


The next step was to figure out the backing. I decided to use a twin-sized sheet because it would save me the trouble of having to sew together strips of store-bought fabric (which are not as wide as my quilt). An added bonus is that Ikea sells twin sheets separately and for only $4.50! I never could have bought the necessary 3 yards of fabric for that bargain price.
Again, I went to the store expecting to buy a raspberry-colored piece of fabric. I had it in my mind that it would be a soothing color to balance the vibrancy of the front. Unfortunately for me, that plan failed. Ikea didn't have that color. The two best options were red or dark blue. I considered the red since it matched the border perfectly. However, I reminded myself that I was looking for something to bring some sense of calm to the quilt. This was, after all, a present for my grandma, not a 7-year-old girl. I settled on the dark blue, even though there wasn't a lick of blue anywhere on the quilt.
I had saved some scraps of fabric from my twelve original prints, and I wanted to incorporate them on the back of the quilt. I think it's prettier when quilts have some pizazz on the back. S had used her scraps to make a strip with alternating pieces of colors and backing. Hers was beautiful and I was inspired! Here's the end result:


It was truly a labor of love.


Thursday, December 16, 2010
A Letter of Complaint
Dear Snow,
We really need to work on your timing. You see, because you chose to come along after the school day had started, you really wreaked a lot of havoc.
We really need to work on your timing. You see, because you chose to come along after the school day had started, you really wreaked a lot of havoc.
- Complaint #1 - I had to work a full day of school, and I didn't get to enjoy the perks of a snow day.
- Complaint #2 - By the time I was able to head home, all the roads were covered with snow, so driving conditions were pretty crappy. That meant that I never really get to accelerate any faster than 8-15 mph.
- Complaint #3 - It took me nearly an hour and a half to get home. That's three times as long as it should have taken!
- Complaint #4 - Hubby's county DID get released one hour early. Yes, I'm jealous.
- Complaint #5 - Because B's county only closed one hour early, the buses didn't have time to finish the high school routes and get to the middle schools on time. Imagine lots and lots of kids dismissed from class with nowhere to go.
- Complaint #6 - B had to stay at work nearly two hours beyond his early release time supervising these children while waiting for buses to trickle in, one at a time.
- Complaint #7 - I never got to see any pretty snow. It's all already muddy, dirty, and gunky.
Wednesday, December 15, 2010
In a Blogshell
I've been collecting ideas and pictures over the past couple weeks to share with you all, but I haven't had a moment to stop and blog. Considering the fact that my family is celebrating Christmas together this weekend, I still don't even really have time... so here it is, in a "blogshell."
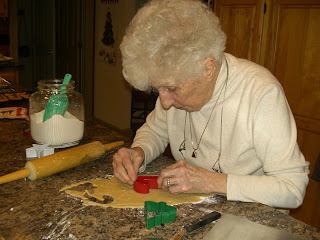
I baked cookies with my mom and grandma:


Eizzil, B, and I went to a Christmas party at Ricky's!

And I've been working on my second quilt. This is me, tonight, finishing sewing the binding on! All that's left is to hand-stitch the other side of the binding. Will I make it?


I baked cookies with my mom and grandma:


Eizzil, B, and I went to a Christmas party at Ricky's!

And I've been working on my second quilt. This is me, tonight, finishing sewing the binding on! All that's left is to hand-stitch the other side of the binding. Will I make it?


Saturday, December 11, 2010
O.P.I Update
Well, Eizzil asked me to give you all an update regarding how lasting the fancy-schmancy nail polish is. As of yesterday, I had a few small chips on the tip of my right-hand pointer finger. Probably because I'm right-handed and I was busy baking cookies all day! I'm guessing that if I had reapplied a clear top coat every night, maybe this wouldn't have happened? (PS: I still really like the color.)
Tuesday, December 7, 2010
Nail Art
I decided to splurge today and buy myself an O.P.I nail polish (upon the recommendation of December's issue of Good Housekeeping). Before this, the "fanciest" nail polish I had ever bought was probably a $5 Revlon. But now I've crossed over into the world of professionals! I'm now the proud owner of a bottle of "Not Tonight Honey" (tee-hee) and I've already painted my nails. Let me just say, the extra money seems to have been worth it! Who would have guessed that the brush would be so much better? Even though I haven't painted my fingernails in years, it was easy as pie with the wide, smooth applicator. Sweet! Now my hands are all glammed-up for the holidays.
Kinda takes me back to the days when I would give myself weekly manicures with hand-painted designs. Can you believe, I wanted to be a nail artist? I used to get sucked into those Saturday-morning commercials for the "Nail Tech School." LOL
 *Photo added per Becca's request :)
Kinda takes me back to the days when I would give myself weekly manicures with hand-painted designs. Can you believe, I wanted to be a nail artist? I used to get sucked into those Saturday-morning commercials for the "Nail Tech School." LOL

Saturday, December 4, 2010
Just a Quickie
I feel like lately I've been so busy crafting, I haven't had time to blog about the crafts! This is just a quick little "hello" to let you know that I'll have LOTS of pictures to share after Christmas. Until then, some of these projects have to stay secret.
Thanks, S and S, for keeping me company today while we sewed!

Thanks, S and S, for keeping me company today while we sewed!

Family Heirlooms in the Making
Yeah, my family is kinda crazy about sentimental heirlooms. So believe me when I say that my mom, my sister, and I spent last Sunday crafting future family heirlooms. My good buddy Eizzil joined us for the fun, and together we sewed sequins onto felt cut-outs all day. Six hours later... we had beautiful holiday light-switch covers to show for all our efforts.


Tuesday, November 30, 2010
A Christmas Tradition
It's our first year having a Christmas tree, and I love that B and I decorated it together. Having company made it so much more memorable!


Thursday, November 25, 2010
Thanksgiving Thanks
- A husband who loves me unconditionally
- Family members who value time spent together
- Friends who share in my love of sewing, scrapping, and all things crafty
- Couples who get just as excited about appetizer parties as B and I do
- Colleagues who make me feel like I'm a part of something special
- A boss who inspires me to learn and do more in the classroom
- Students who remind me daily that my work is meaningful
- A home that is safe and warm
- A life that is fulfilling
Monday, November 22, 2010
Quilt Update
So tonight and tomorrow night we host parent/teacher conferences at school. Technically, I could have gone home between the regular school day and my first conference at 5:30pm, but I would have lost a third of my "free time" just driving back and forth. I came up with a better solution... I brought my sewing machine to work! That's right: for those three hours between work and conferences, I sat merrily at a student desk with my sewing machine and worked on sewing my blocks into strips. Just to make things a bit more fun, I put Funny Girl on the big screen and belted the songs out along with Barbra. Gotta love it! It was way more fun than traffic, and it allowed me to get a lot accomplished. (Here's the actual "quilt update" part: All my strips are sewn, so all that's left to do is to sew the strips to one another to make the quilt top).


Tuesday, November 16, 2010
"Disappearing Nine" Quilt - My Process
I've been gearing up for a new quilt, and finally got all the pieces (pardon the pun) in place. This quilt is the first gift I'm making for someone else, and I'm super excited about it! Because I have someone special in mind, I wanted the colors to be just right. This person always complimented me on how fresh and pretty the color combination of my first quilt was, so I did my best to find an equally appealing color combination for their quilt. Within minutes of walking into my favorite quilt shop, I had found my "base" print. You know, the one to which I would match every other fabric. After much deliberation (and not much help from the quilt-shop ladies) I decided upon 10 prints. I bought one fat quarter each of the nine orange/red prints and two fat quarters of the green one. I had it in my mind that I was going to use the green print for the "middle" squares of the disappearing nine block. Then I did some research using Google Images (thank you!) and I realized that I wanted a randomized look that would have been impossible to achieve by using the green print repeatedly as the middle block.
Not random. Not my style:

Random! Yay! According to this blogster, the key to her success was four prints used repeatedly in no specific order.

Since I had already bought 10 different prints I was going to have to get creative in order to achieve a state of randomness. I went back to the fabric store (JoAnn's this time since I had exhausted my options at the other place) and found two more prints that I felt would balance my 10. I felt like too many of my original ten were prints on top of a cream background. I wanted a couple more that had saturated backgrounds. So I found a predominately red and another orange to round out my collection. I got rid of the duplicate green print and decided to work with these 12 prints.

I have since cut twelve 5" squares out of each fat quarter:

Then, in order to make sure that every print ended up in every position in the Disappearing Nine pattern, I sorted the fabrics into three piles: "middle," "4 middles," and "4 corners."

Then, one 9-block at a time, I laid out the squares and then sewed the rows of threes together.


I needed some technique to help me remember which row went on top, in the middle, and on the bottom. I was mulling over this while driving, so that's probably why I decided upon using color-coded pins (like traffic lights). A red pin marks the bottom row, yellow in the middle, and green at the top. So far, it's worked like a charm!
I ironed the seams flat in alternating directions: top row left, middle right, bottom left.

I'm now at the point where I'm sewing each of the three rows together in order to make my 9-blocks. I was so excited to be at this point already that I went ahead and "finished" one of the disappearing nine blocks.
I sewed each of the rows together and ironed the seams flat...

Then I used my rotary cutter to cut the 9-block into four blocks...


Once I'm done creating each of my finished blocks, I can then decide how to combine all of them for the most impact. Here's a sneak-peek of what it might look like (keep in mind, that it will look more random than this because not all of the smallest squares will be in that red print):

Stay tuned for more (I might just turn this into a tutorial)!
Sunday, November 7, 2010
"Housewife"...?
Apparently, "housewife" is what one calls a needle holder. Who knew?! I made one tonight out of some fabric scraps: cotton and felt. Now I have a cute little place to keep my needles. Sweet!


Thursday, November 4, 2010
New Project
Tonight I cut out the pieces for my next sewing project. Too bad I can't show you anything more than the fabric... it's coming up on Christmas and I need to keep some secrets!


Wednesday, November 3, 2010
Ribbon Blanket for Baby
B and I have some friends who just moved here from the UK so I've been putting together a little "welcome" package for them. A plant for mom, some whiskey for dad. Neither of these gifts were really appropriate for their 6-month-old daughter, so I decided to make her a ribbon blanket. Apparently these things are all the rage among the infant crowd. I hope she likes it!


*UPDATE: Baby Ward loved her new ribbon blanket. Yay!

Sunday, October 31, 2010
Rally to Restore Sanity... Causes INsanity
B and I headed out early Saturday morning on our way to change America. We were going to participate in the "Rally to Restore Sanity and/or Fear," hosted by Jon Stewart and Stephen Colbert on the National Mall in DC. Lots of other folks had a similar idea. So many other folks, in fact, that we were unable to appreciate the darn thing! After shuffling about South to North to West for over an hour, we gave up. We were so disappointed at how unprepared they were for the swarms of people. There weren't enough Jumbotrons or speakers. As if that weren't enough, they were scrambling all of the cell phone signals so that we couldn't call or text our friends to establish a meeting spot! We never found our friends, and we never found a place where we could stop and enjoy the show. So, we came up with "Plan B" and walked to E's place to find a little sanity. She and her fiancée were wonderful hosts and welcomed us to stay all day. At last we were able to enjoy a little bit of our day in DC.
The line to pay for parking at the metro station:

The line to buy a metro pass, weaving back and forth through the parking garage...

...and still weaving outside the parking garage:

We are NOT okay with this:

But we out-smarted the lines! We already had metro passes! We could by-pass the ENTIRE snaking line and get right onto an arriving train! (Good thing my claustrophobic phase is over....)

Finally in L'Enfant station on our way upstairs to the rally:

Kinda funny... I thought S might like the sign on the left:

The Rally to Restore Sanity and/or Fear:

The Mall was a wee-bit crowded. To our left:

And to our right (PS: the stage is somewhere in this direction, but we couldn't even see it):

Once we shuffled our way to the other side of the Mall we realized things weren't any better. These are the steps to the National Archives:

And here we are in the crowd of people who, like us, have given up and are just trying to get away from it all. Even leaving wasn't easy!

Hehe... I really, kinda liked this one:

Standing in the middle of Pennsylvania Avenue. I mean, how often to you get to pose for a picture like this?!

In the sanctuary that is E & M's place. Thank goodness for the Game of Life!

Subscribe to:
Posts (Atom)