What is with my craving for something sweet after every meal?! That is just a bad habit to get into, and yet I seem to be into it. A bite of chocolate babka. Ice cream sandwich. Mini peanut butter cup. Even a measly kiss will do the trick.
Ahh!
Must . . . resist.
(So what temptation are you working on resisting ...and how's that going for you?)
Monday, February 28, 2011
Tuesday, February 22, 2011
Sun-Room Makeover
B and I spent our *five day weekend* shopping for furniture, assembling said furniture, and then shopping for fabrics to complete the sun-room makeover. This room gets the most natural light in our house (hence the name), so it was important to have a multi-functional space. A place where I could sew, B could study, we could snuggle up and read... you get the idea. The result is still a work in progress, but it's well on its way to beautiful!
BEFORE: Maple table and chairs. No color.

PHASE 1: New black chairs and red comfy couch. I also moved my reading lamp and an old ottoman into this space so that we could better appreciate them. Although there's color now, the room still doesn't seem cohesive.

PHASE 2: After spending two-and-a-half hours in Jo-Ann Fabrics, I came home with the following array of new fabric. The plan was to find a way to tie the yellow walls in with the red chair and the teal accents in the living room. You can see that two of the prints combine all three! Score!

Here I've draped the fabrics over the pillow forms and the ottoman. I still have LOTS of sewing to do, and I can't wait.

Monday, February 21, 2011
Project: Beer-Brewing-Jug "Cozy"
My brother-in-law-to-be's birthday was in December. You may recall that that was back when I was feverishly working to finish my Gma's Christmas quilt. As a result, I had to give M a coupon good for one "beer-brewing-jug cozy." This was something he had requested of me. It has no name. He's never seen one for sale, but he thought it would be a good invention. Currently, whenever he gets to the beer-brewing-jug stage of the process, he wraps a blanket around the jug. Of course there ends up being way more fabric than necessary. So he requested a cozy. Something to keep the light out.
Let me just start by saying that I have been "planning" this project in my head for MONTHS! I just couldn't quite finalize my plans for how to make a template for this unique shape. I mean, it's big! And it's curvy!

The problem, however, is that I refused to start any other project until this one was finished. (As you may have noticed, I just bought a lot of pretty fabric for my next quilt). This riddle was in my way! And the only reason I hadn't started it yet, was because I was procrastinating. Because there weren't any directions to follow.
So here are the directions I made up for myself:
1] I decided to use pre-quilted fabric so that it would provide a thick enough barrier to keep out the light. There weren't a lot of "manly" fabric options, so I chose this brown with blue swirls because I knew it would coordinate with the colors in M's house. Plus, the blue swirls reminded me of liquid. So it's thematic, right?
2] I started by measuring the height of the straight side of the jug. I gave an extra inch because I knew I would lose some of the length once I sewed it to the other pieces of fabric. It turns out that the extra length worked beautifully because the finished product is about 1/2 an inch too long -- so it rolls out at the bottom and prevents any light from sneaking in.

3] In order to figure out the top, I measured from the edge up to the opening, which was about 5 1/2". Then I measured the circumference at the widest part, which was about 40". I cut four rectangles 6" by 10 1/2" (having rounded all measurements up by about 1/2" just to be safe). I laid these four rectangles on top of the jug, over-lapping one another, and pinned them to each other. I lifted the rectangle-shapes off of the jug and laid them flat on the table.
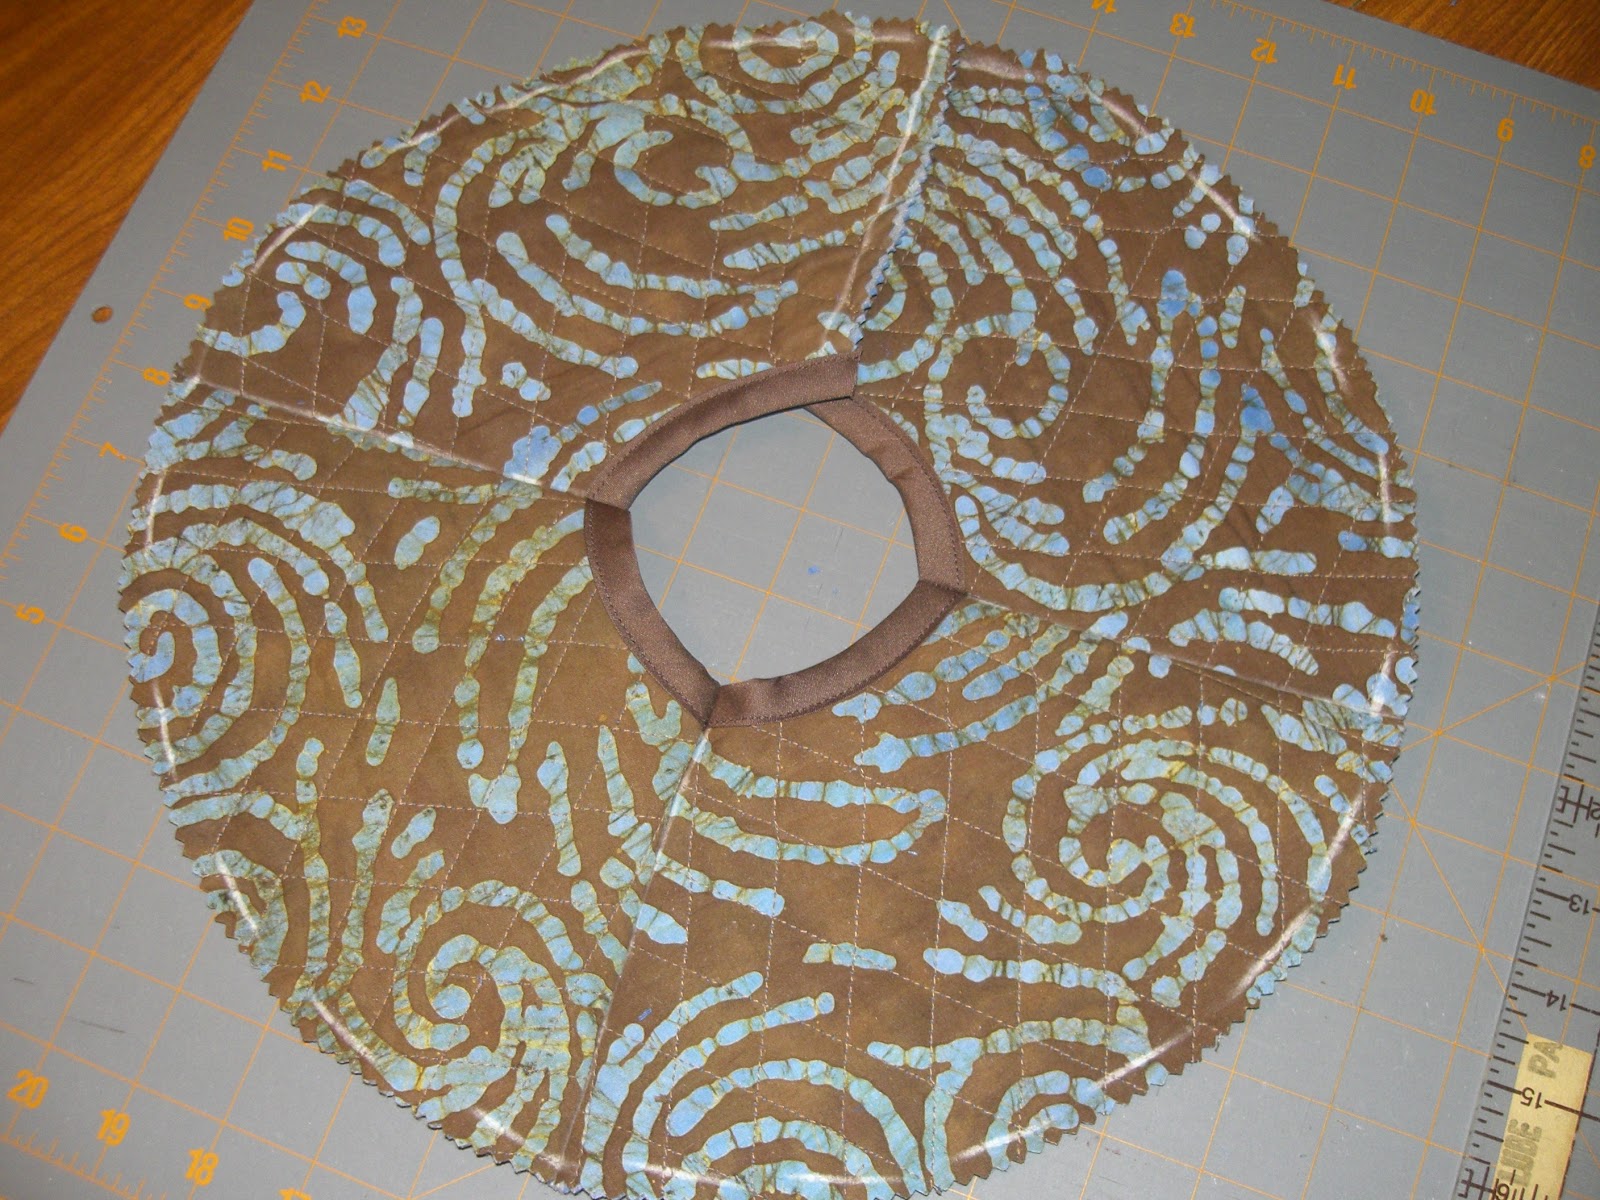
4] I didn't take a picture of this next step (darnnit!) but I'll try to explain it to you. The opening of the jug is round, so I wanted the opening of my cozy to be round as well. I measured the diameter of the jug's opening (3"). Then I tied a piece of string to a small pin, which I had stuck in the center of the opening of my rectangles. I measured 1 1/2" (the radius) and marked it on the string. Then I pulled the string and used it to mark 1 1/2" from the center in all directions. This created an accurate chalk-line circle. I used my scissors to trim the edges. See the center circle?

5] Next, I used a ruler and chalk to draw lines from one corner, through the center, to the opposite corner. I did this on both the front and the back of the fabric. Then, I used the chalk lines as a guide (this line represented where I would stitch). I used my pinking shears to cut away the excess fabric, leaving only 1/4" seam allowance.


6] Because I was working with pre-quilted fabric, it would have been nearly impossible to fold over the raw edges in order to get a finished look. So, I bought a pack of extra-wide double-fold binding to sew around the edges. Before I stitched the edges of each "triangle" together, I first sewed the binding around the inner circle. I knew it would have been very difficult to sew such a tight circle if I had done it after stitching the triangles together.
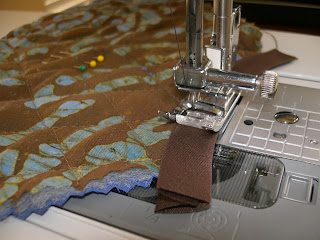

7] Now, I was ready to sew the triangles together. Right-sides together, being careful to match the binding on one piece to another. I sewed three of the four seams together. I left the final one open. You'll see why in a moment.

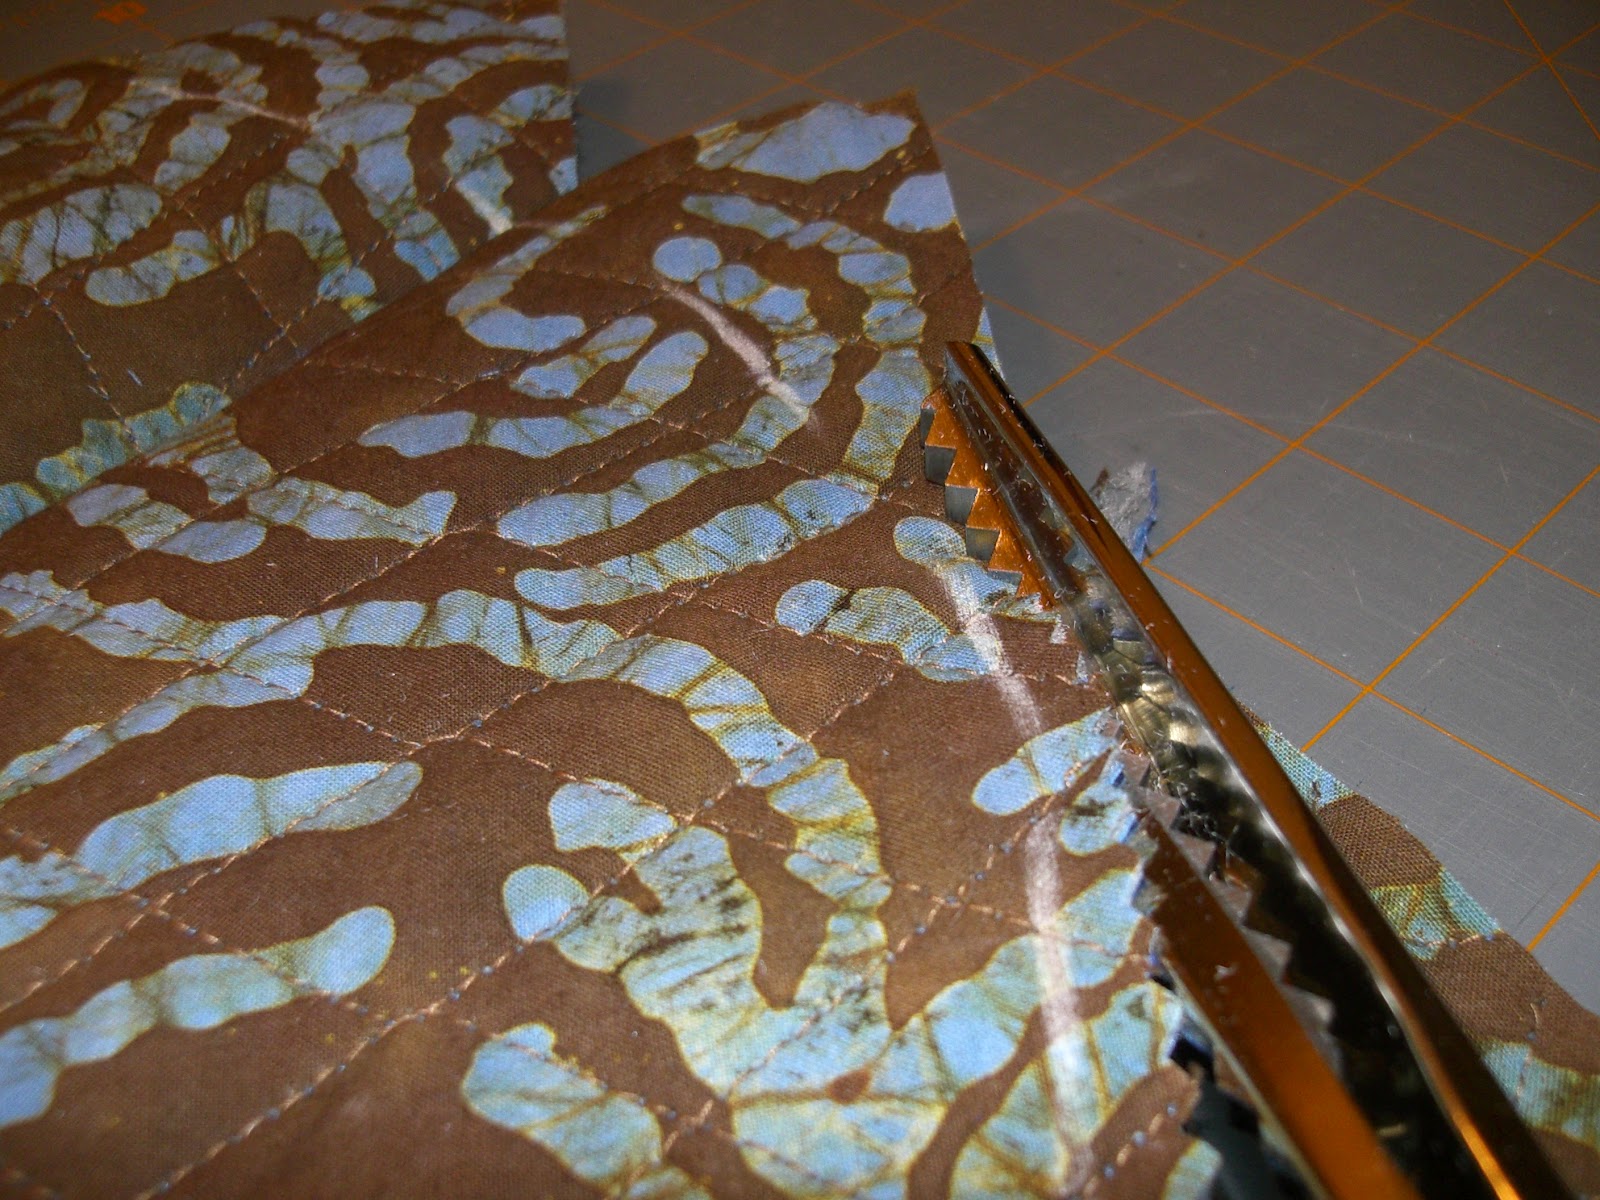
8] Now this time I took pictures! I used the same pin/string technique to make a circle out of the boxy-shape you see above. Again, I measured the radius, marked it on a string, and used chalk to mark the circle. I used my pinking shears to trim the edges.
Measuring and marking the radius on the string using a permanent marker.


Below, you can see I've marked my first measurement in chalk -- right by my thumb.

See the chalk-line circle?

I trimmed about 1/4" outside of the chalk-line circle. The circle indicates where I will sew, not where I will cut. It was important for me to leave some excess fabric (the seam allowance).


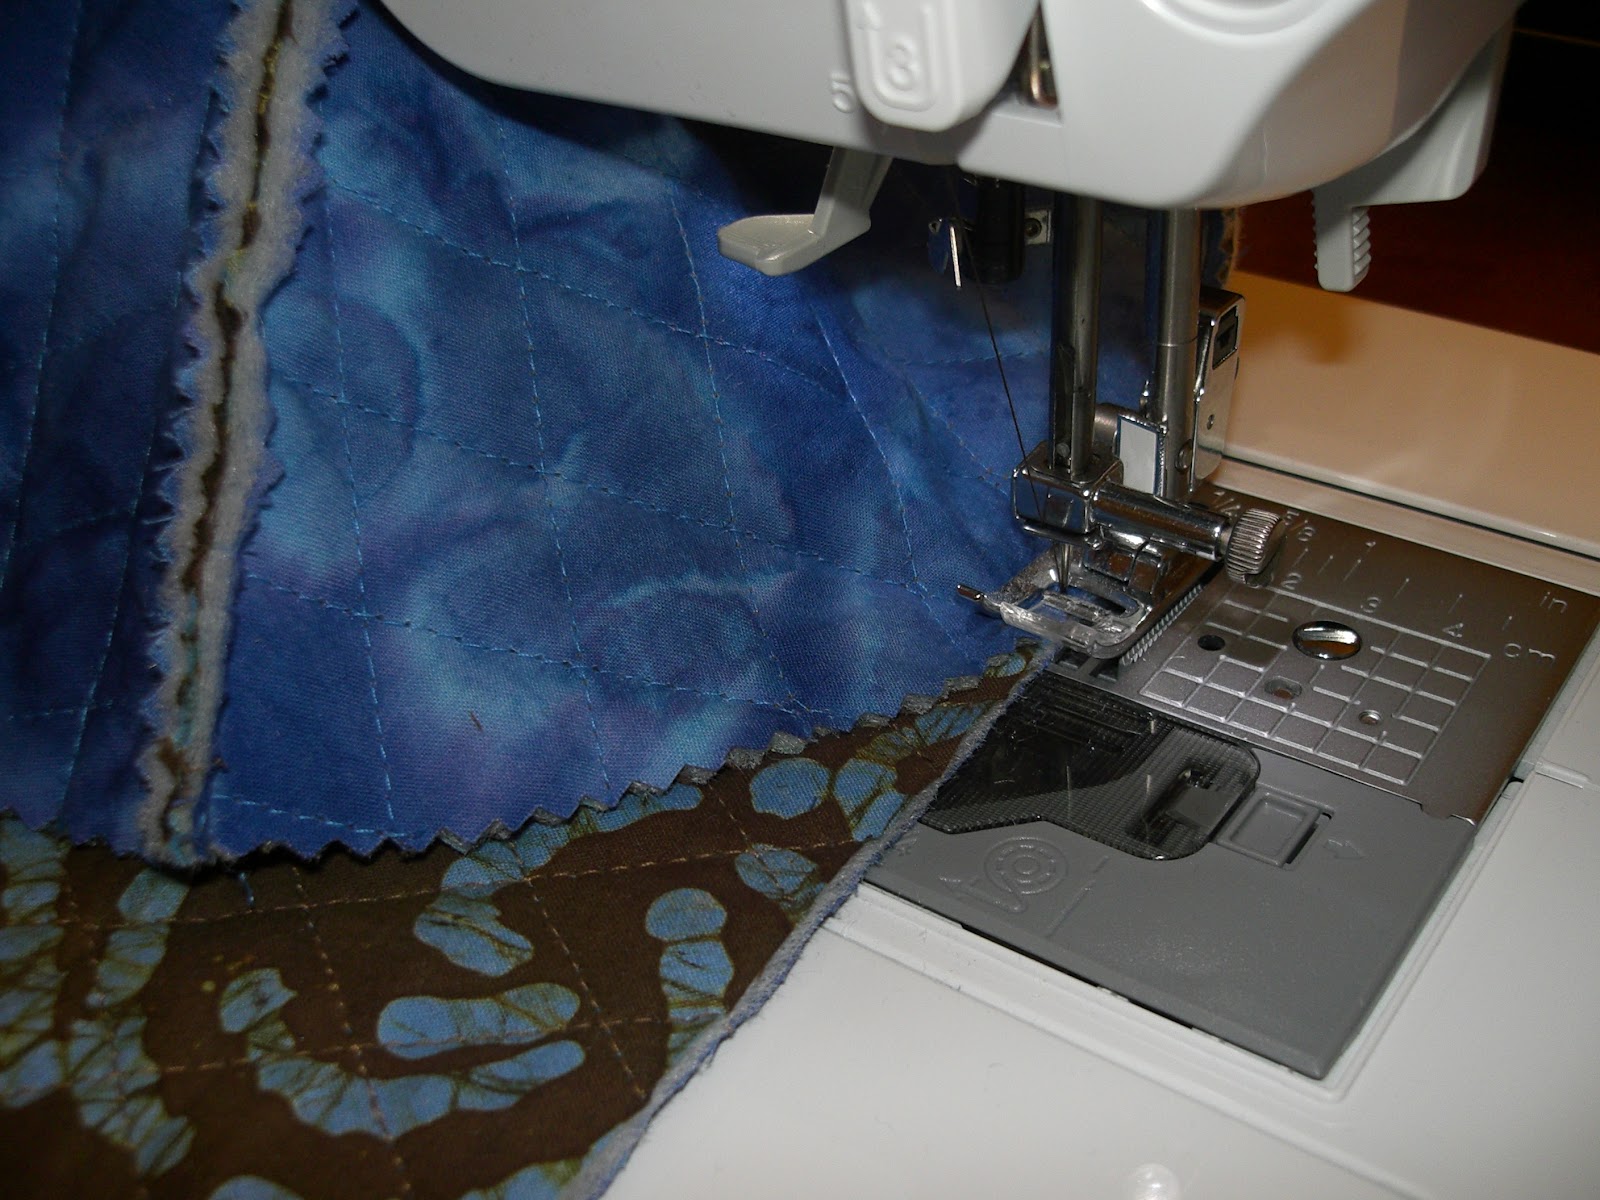
9] Now it was finally time to attach the top to the bottom (right sides together). I started at the open seam in the circle and lined it up with one of the edges of the bottom, rectangular piece of fabric. This was the trickiest part because the top fabric had a curved edge and the bottom fabric had a straight edge. I used two hands and sewed carefully, always stopping to adjust and align the two pieces of fabric.


10] At this point, I sewed the double-fold binding around the bottom edge of the cozy. I decided to sew it at this point in the project (before "closing up" the final seam) so that the raw edges of the binding would get "closed" into the final seam.

11] Last step! I turned the cozy inside-out and put right sides together. I stitched from one end all the way up to the other -- almost as if I was zipping the whole thing closed.

Done! Ta-da!


I even added one of my brand-new tags (a birthday present from my mom). I feel so professional now!

Let me just start by saying that I have been "planning" this project in my head for MONTHS! I just couldn't quite finalize my plans for how to make a template for this unique shape. I mean, it's big! And it's curvy!

The problem, however, is that I refused to start any other project until this one was finished. (As you may have noticed, I just bought a lot of pretty fabric for my next quilt). This riddle was in my way! And the only reason I hadn't started it yet, was because I was procrastinating. Because there weren't any directions to follow.
So here are the directions I made up for myself:
1] I decided to use pre-quilted fabric so that it would provide a thick enough barrier to keep out the light. There weren't a lot of "manly" fabric options, so I chose this brown with blue swirls because I knew it would coordinate with the colors in M's house. Plus, the blue swirls reminded me of liquid. So it's thematic, right?
2] I started by measuring the height of the straight side of the jug. I gave an extra inch because I knew I would lose some of the length once I sewed it to the other pieces of fabric. It turns out that the extra length worked beautifully because the finished product is about 1/2 an inch too long -- so it rolls out at the bottom and prevents any light from sneaking in.

3] In order to figure out the top, I measured from the edge up to the opening, which was about 5 1/2". Then I measured the circumference at the widest part, which was about 40". I cut four rectangles 6" by 10 1/2" (having rounded all measurements up by about 1/2" just to be safe). I laid these four rectangles on top of the jug, over-lapping one another, and pinned them to each other. I lifted the rectangle-shapes off of the jug and laid them flat on the table.
4] I didn't take a picture of this next step (darnnit!) but I'll try to explain it to you. The opening of the jug is round, so I wanted the opening of my cozy to be round as well. I measured the diameter of the jug's opening (3"). Then I tied a piece of string to a small pin, which I had stuck in the center of the opening of my rectangles. I measured 1 1/2" (the radius) and marked it on the string. Then I pulled the string and used it to mark 1 1/2" from the center in all directions. This created an accurate chalk-line circle. I used my scissors to trim the edges. See the center circle?

5] Next, I used a ruler and chalk to draw lines from one corner, through the center, to the opposite corner. I did this on both the front and the back of the fabric. Then, I used the chalk lines as a guide (this line represented where I would stitch). I used my pinking shears to cut away the excess fabric, leaving only 1/4" seam allowance.


6] Because I was working with pre-quilted fabric, it would have been nearly impossible to fold over the raw edges in order to get a finished look. So, I bought a pack of extra-wide double-fold binding to sew around the edges. Before I stitched the edges of each "triangle" together, I first sewed the binding around the inner circle. I knew it would have been very difficult to sew such a tight circle if I had done it after stitching the triangles together.


7] Now, I was ready to sew the triangles together. Right-sides together, being careful to match the binding on one piece to another. I sewed three of the four seams together. I left the final one open. You'll see why in a moment.

8] Now this time I took pictures! I used the same pin/string technique to make a circle out of the boxy-shape you see above. Again, I measured the radius, marked it on a string, and used chalk to mark the circle. I used my pinking shears to trim the edges.
Measuring and marking the radius on the string using a permanent marker.


Below, you can see I've marked my first measurement in chalk -- right by my thumb.

See the chalk-line circle?

I trimmed about 1/4" outside of the chalk-line circle. The circle indicates where I will sew, not where I will cut. It was important for me to leave some excess fabric (the seam allowance).
9] Now it was finally time to attach the top to the bottom (right sides together). I started at the open seam in the circle and lined it up with one of the edges of the bottom, rectangular piece of fabric. This was the trickiest part because the top fabric had a curved edge and the bottom fabric had a straight edge. I used two hands and sewed carefully, always stopping to adjust and align the two pieces of fabric.


10] At this point, I sewed the double-fold binding around the bottom edge of the cozy. I decided to sew it at this point in the project (before "closing up" the final seam) so that the raw edges of the binding would get "closed" into the final seam.

11] Last step! I turned the cozy inside-out and put right sides together. I stitched from one end all the way up to the other -- almost as if I was zipping the whole thing closed.

Done! Ta-da!


I even added one of my brand-new tags (a birthday present from my mom). I feel so professional now!

Sunday, February 20, 2011
Priceless
I got a little note from Grandma along with this picture in the mail the other day. It's such a treat to know how much she's enjoying her quilt!


Friday, February 18, 2011
The Start of Something Beautiful
Today Cobble and I visited our favorite quilt shop, and I was able to piece together the makings of a beautiful new quilt. Thank goodness for Cobble's helpful suggestions (and the friendliness of the women in the shop -- a pleasant surprise!)
In order to figure out which fabrics I wanted to use, I started with a striking "starter" print to which I matched all the others. You can see my starter fabric in the center of the picture below.

I tried to get a good balance of colors: green, brown, and blue. As I walked around the shop selecting prints, I set them on a counter in order to see them side-by-side. Initially, I had chosen too many yellowy fabrics, and I was disappointed with their overall effect. That's when Cobble came to my rescue! She found the green cat-print and the blue circles (in the upper right-hand corner). They were the perfect replacements! I'm really happy with the results and can't wait to get started.
Tuesday, February 15, 2011
Blog-worthy?
Ever get in a blogging "slump"? You know, where you feel like you don't have anything worth blogging about? I've got plenty of things keeping me busy from day-to-day, but I'm just not sure any of you would be interested in reading about it. I'm not even sure if this bit of rambling was worthy...
Tuesday, February 8, 2011
Back to Basics
This post is a bit late, but I wanted to share my first sewing project of the new year. I finished it just before the end of January. I was inspired to make a rice-filled heating pad after my doctor told me it would make my TMJ feel better. Anything to be able to chew without pain!
As Serendipity would have it, I came upon this tutorial on SewMamaSew (thank you!). I used materials that I already had in my stash -- which wasn't so bad since I kinda love the fruit fabric. I also got to debut my new pinking shears (yay!). The hardest part was deciding which scraps to use and in which order. The final result isn't so bad if I do say so myself!


As Serendipity would have it, I came upon this tutorial on SewMamaSew (thank you!). I used materials that I already had in my stash -- which wasn't so bad since I kinda love the fruit fabric. I also got to debut my new pinking shears (yay!). The hardest part was deciding which scraps to use and in which order. The final result isn't so bad if I do say so myself!


Sunday, February 6, 2011
A Splash of Color
Our master bath has always been very "blah" with white walls, a white shower curtain, a white floor, and a white sink cabinet. Boring! I finally found a piece of art today that I thought was pretty. And it was meant-to-be because several aisles over I found a coordinating shower curtain. Love them together!
*PS: The color is a lovely, light spring-green.


*PS: The color is a lovely, light spring-green.


Saturday, February 5, 2011
How to Praise Kids
I read this in an article about the infamous "Tiger Mom" and found it thought-provoking. It's definitely something for all of us teachers and parents to ponder!
Quote from Time Magazine:
Stanford psychologist Carol Dweck "has conducted studies with hundreds of students, mostly early adolescents, in which experimenters gave the subjects a set of difficult problems from an IQ test. Afterward, some of the young people were praised for their ability: 'You must be smart at this.' Others were praised for their effort: 'You must have worked really hard.' The kids who were complimented on their intelligence were much more likely to turn down the opportunity to do a challenging new task that they could learn from. 'They didn't want to do anything that could expose their deficiencies and call into question their talent,' Dweck says. Ninety percent of the kids who were praised for their hard work, however, were eager to take on the demanding new exercise."
Thursday, February 3, 2011
"Phew, the relief!"
If my house could talk... that's probably what it would say!
I'm ashamed to admit it, but Christmas decorations were still in piles--halfway packed up--on my dining room table and in various corners of my living room. I just didn't have the motivation to finally finish wrapping all those breakable ornaments! However, I'm proud to say that in a fit of energy (or desperation?), I put the last piece of tissue paper around the last little glass angel. B came in for the assist and carried all the boxes (and the bagged Christmas tree) up into the attic.
Yay!
PS: Dinner at the dining room table was a nice treat last night.
Subscribe to:
Posts (Atom)