Let me just start by saying that I have been "planning" this project in my head for MONTHS! I just couldn't quite finalize my plans for how to make a template for this unique shape. I mean, it's big! And it's curvy!

The problem, however, is that I refused to start any other project until this one was finished. (As you may have noticed, I just bought a lot of pretty fabric for my next quilt). This riddle was in my way! And the only reason I hadn't started it yet, was because I was procrastinating. Because there weren't any directions to follow.
So here are the directions I made up for myself:
1] I decided to use pre-quilted fabric so that it would provide a thick enough barrier to keep out the light. There weren't a lot of "manly" fabric options, so I chose this brown with blue swirls because I knew it would coordinate with the colors in M's house. Plus, the blue swirls reminded me of liquid. So it's thematic, right?
2] I started by measuring the height of the straight side of the jug. I gave an extra inch because I knew I would lose some of the length once I sewed it to the other pieces of fabric. It turns out that the extra length worked beautifully because the finished product is about 1/2 an inch too long -- so it rolls out at the bottom and prevents any light from sneaking in.

3] In order to figure out the top, I measured from the edge up to the opening, which was about 5 1/2". Then I measured the circumference at the widest part, which was about 40". I cut four rectangles 6" by 10 1/2" (having rounded all measurements up by about 1/2" just to be safe). I laid these four rectangles on top of the jug, over-lapping one another, and pinned them to each other. I lifted the rectangle-shapes off of the jug and laid them flat on the table.
4] I didn't take a picture of this next step (darnnit!) but I'll try to explain it to you. The opening of the jug is round, so I wanted the opening of my cozy to be round as well. I measured the diameter of the jug's opening (3"). Then I tied a piece of string to a small pin, which I had stuck in the center of the opening of my rectangles. I measured 1 1/2" (the radius) and marked it on the string. Then I pulled the string and used it to mark 1 1/2" from the center in all directions. This created an accurate chalk-line circle. I used my scissors to trim the edges. See the center circle?

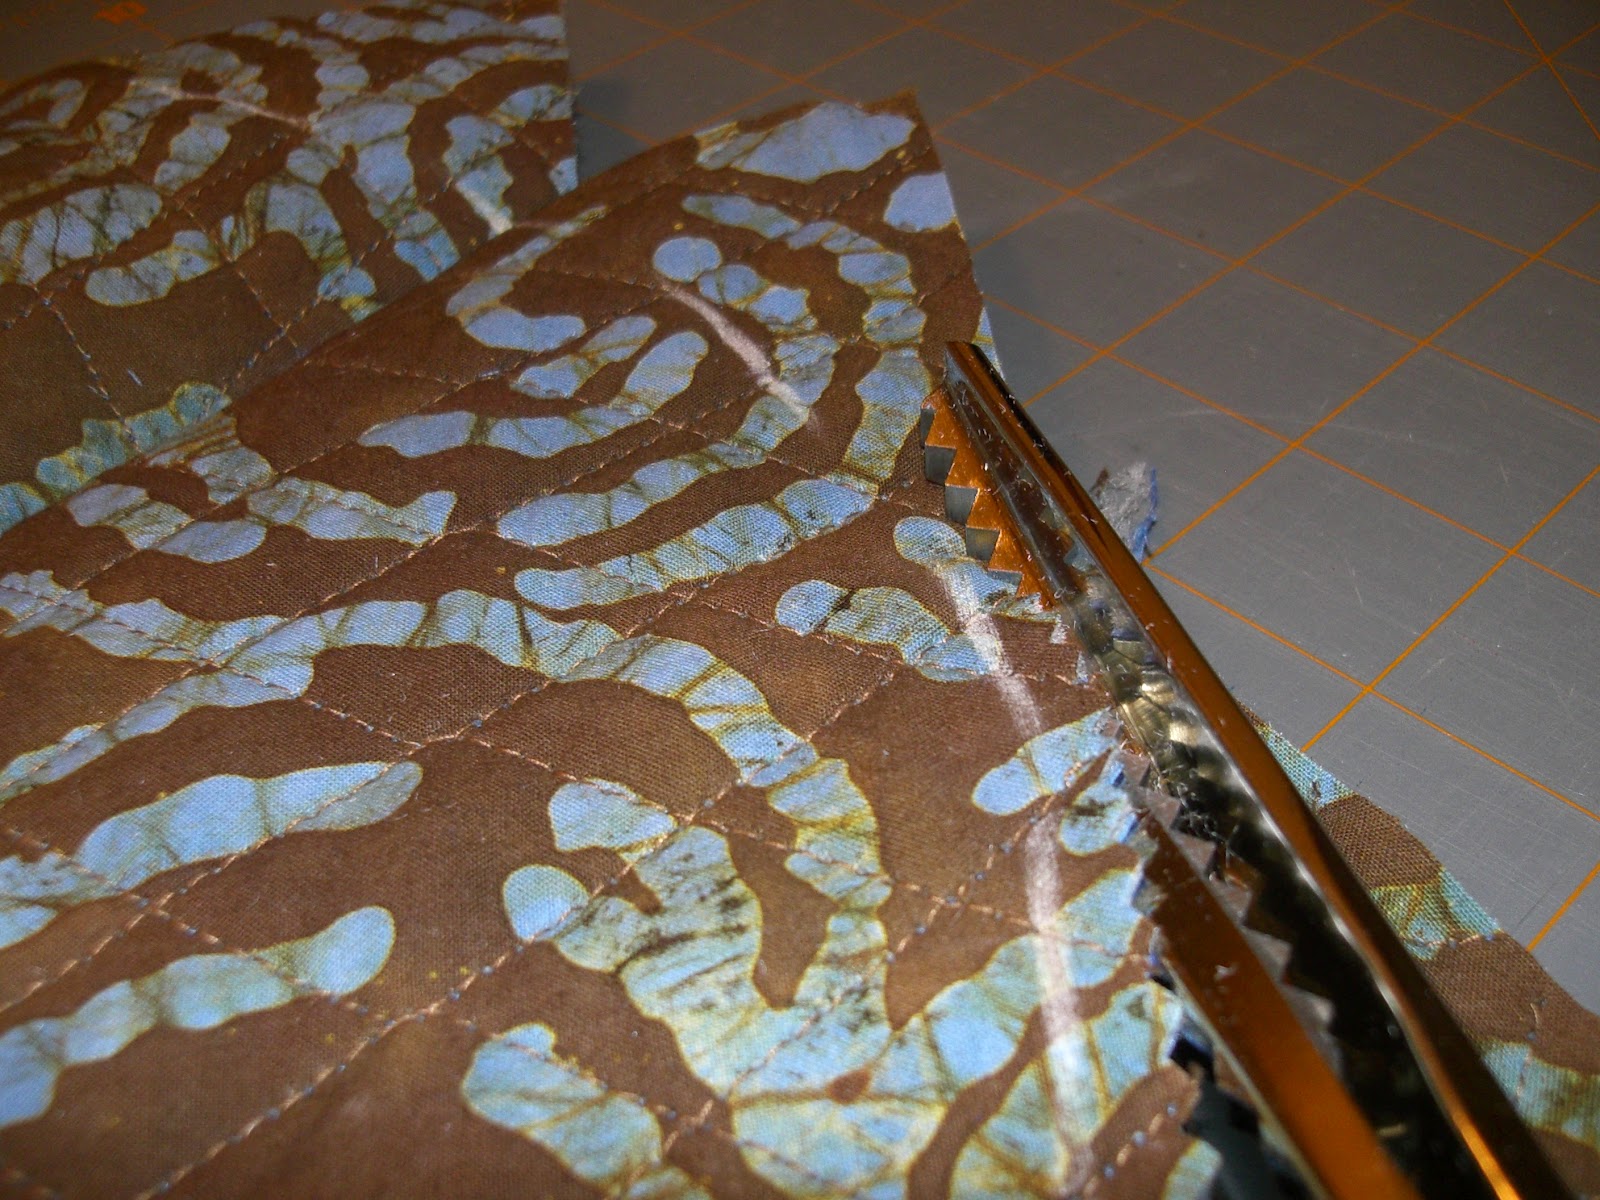
5] Next, I used a ruler and chalk to draw lines from one corner, through the center, to the opposite corner. I did this on both the front and the back of the fabric. Then, I used the chalk lines as a guide (this line represented where I would stitch). I used my pinking shears to cut away the excess fabric, leaving only 1/4" seam allowance.


6] Because I was working with pre-quilted fabric, it would have been nearly impossible to fold over the raw edges in order to get a finished look. So, I bought a pack of extra-wide double-fold binding to sew around the edges. Before I stitched the edges of each "triangle" together, I first sewed the binding around the inner circle. I knew it would have been very difficult to sew such a tight circle if I had done it after stitching the triangles together.


7] Now, I was ready to sew the triangles together. Right-sides together, being careful to match the binding on one piece to another. I sewed three of the four seams together. I left the final one open. You'll see why in a moment.

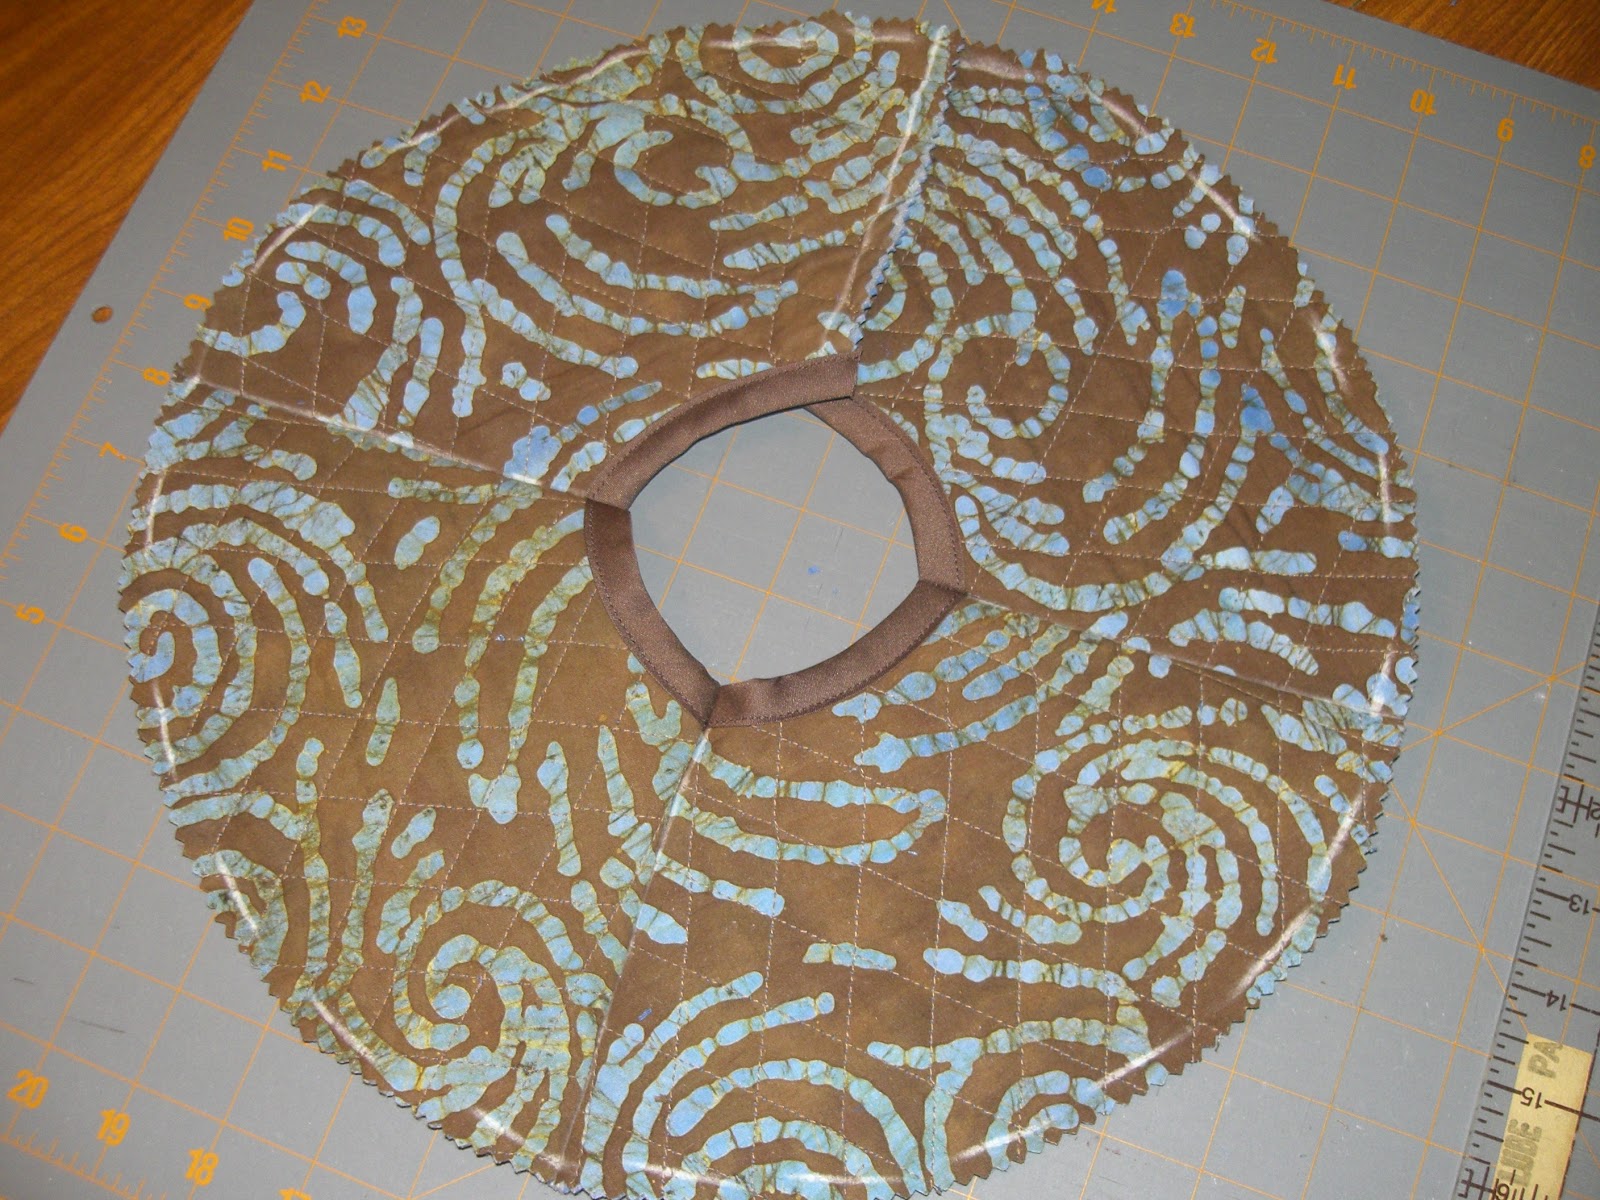
8] Now this time I took pictures! I used the same pin/string technique to make a circle out of the boxy-shape you see above. Again, I measured the radius, marked it on a string, and used chalk to mark the circle. I used my pinking shears to trim the edges.
Measuring and marking the radius on the string using a permanent marker.


Below, you can see I've marked my first measurement in chalk -- right by my thumb.

See the chalk-line circle?

I trimmed about 1/4" outside of the chalk-line circle. The circle indicates where I will sew, not where I will cut. It was important for me to leave some excess fabric (the seam allowance).
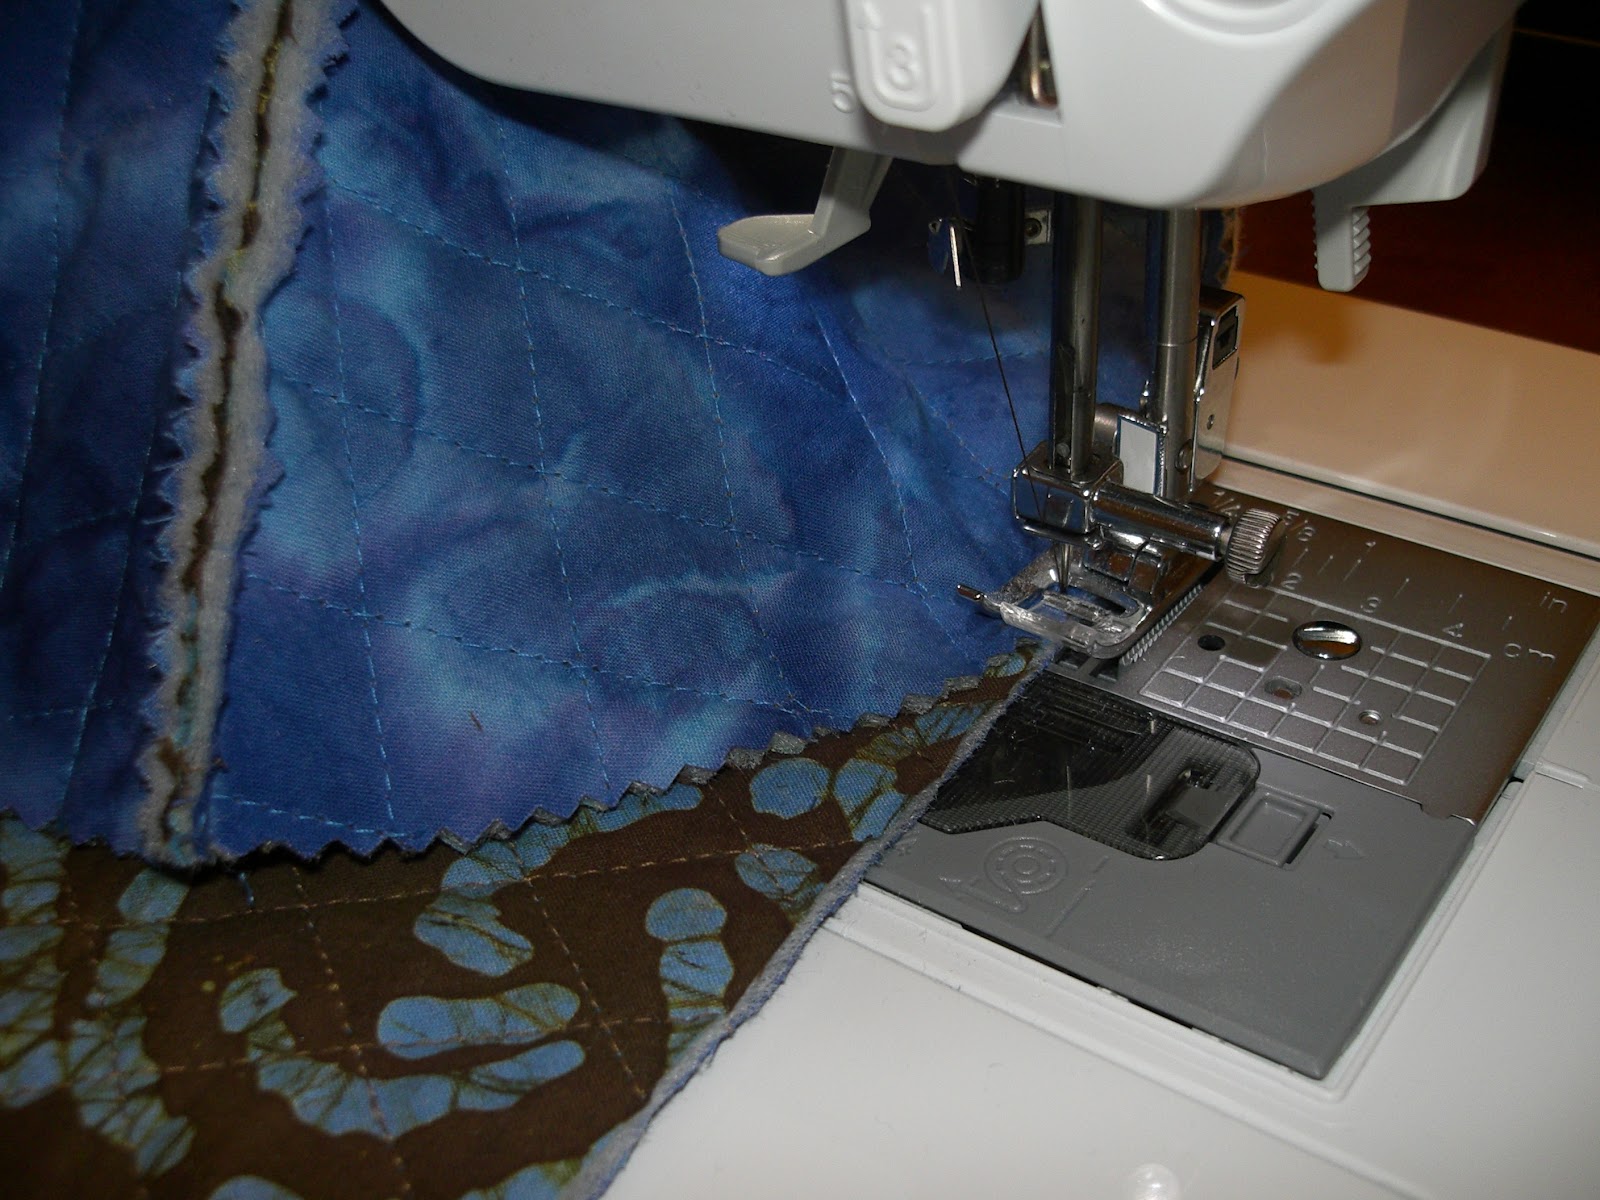
9] Now it was finally time to attach the top to the bottom (right sides together). I started at the open seam in the circle and lined it up with one of the edges of the bottom, rectangular piece of fabric. This was the trickiest part because the top fabric had a curved edge and the bottom fabric had a straight edge. I used two hands and sewed carefully, always stopping to adjust and align the two pieces of fabric.


10] At this point, I sewed the double-fold binding around the bottom edge of the cozy. I decided to sew it at this point in the project (before "closing up" the final seam) so that the raw edges of the binding would get "closed" into the final seam.

11] Last step! I turned the cozy inside-out and put right sides together. I stitched from one end all the way up to the other -- almost as if I was zipping the whole thing closed.

Done! Ta-da!


I even added one of my brand-new tags (a birthday present from my mom). I feel so professional now!

I would have given up at step one :) Thank goodness I don't know anyone who would need a beer cozy! Good job. The fabric is cool.
ReplyDeleteok, you are like officially a sewer. (not sure if that's a word, but seamstress just sounds so old....) all that without a pattern--genius! and i covet your labels :)
ReplyDeleteI think you need to market this pattern to sell on Etsy, or even the jug covers themselves! I'm sure people are looking for something out there! :)
ReplyDeleteAwesome!!! Pretty impressive. I remember trying to figure out how to sew my beach umbrella bag which also had a round piece that had to go into a tube, and trying to remember geometry to figure out how big to make the round bottom...Thanks for sharing the whole process, and the finished product is great. I'm sure he will really appreciate it!
ReplyDeleteAwesome awesome awesome! M. really loves his new beer-jug-cozy and so do I because it's a pretty way to cover up the ugly jug while it sits in our home mid-brewing process. Yay! :)
ReplyDelete